| |
New appointments can be created in the Daily, Week or Month View.
- Daily View: Click the
 button. button.
- Week View: Click the
 button near the particular day in the week area or click the button in the daily appointments area. button near the particular day in the week area or click the button in the daily appointments area.
- Month View: Click the button near the particular day.
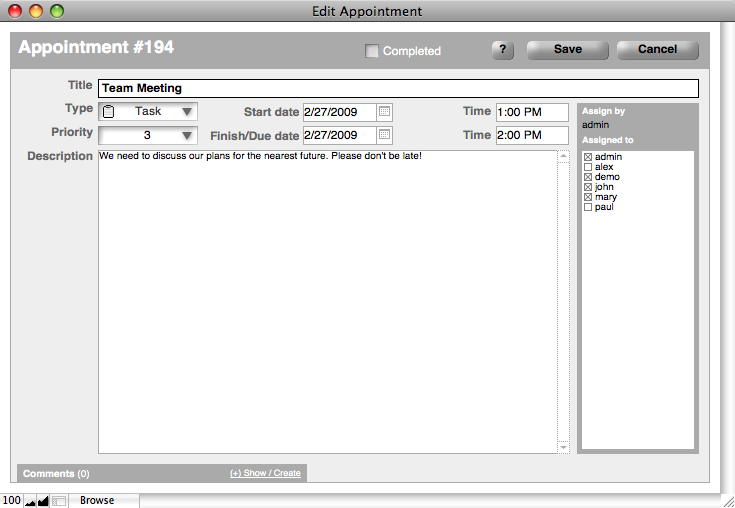
Adding a new appointment opens the dialog window below:
Appointments can be described by type, priority, title, description, start date, finish date, time, repetition and assign-to user list.
The appointment title or an abbreviated version is located in each view. The appointment type is shown before the title as an icon. Three different icons are used to represent each appointment type:
The appointment description is only available while viewing the particular appointment.
The duration of each appointment can be defined and will be displayed in all views for the specified time period. The same appointment can be set to recur in Repetition mode. Just specify the duration and the schedule that the appointment should recur: never, every day, every week, every month or every year.
To move a single appointment up or down on the appointment list, specify its Priority. The default priority for any new appointment is 3. Specifying a higher priority will move the appointment up on the list.
Appointments with the same priority will be sorted by appointment time.
Appointments can be assigned to other users in the "Assign-to" field. Each user specified will see that an appointment has been assigned.
To save the appointment, click the  button. Otherwise click button. Otherwise click  . .
|
|